Are you confused about the best way to use a beauty blender? Look no further as we uncover the secrets to flawless makeup application with this versatile tool. Whether you’re a makeup novice or a beauty enthusiast, we’ve got you covered with tips and tricks that will leave you wondering how you ever lived without a beauty blender. Say goodbye to streaky foundation and hello to a flawless, airbrushed finish – all with just a simple sponge. So, grab your beauty blender and get ready to elevate your makeup game to new heights!
Choosing the Right Beauty Blender
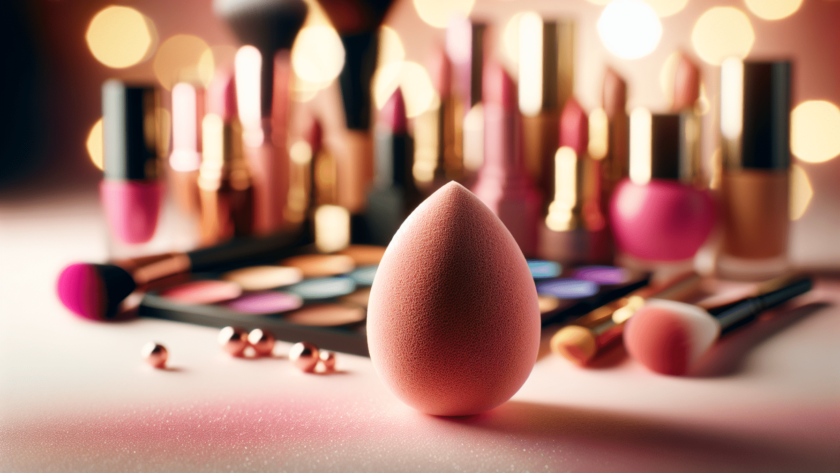
When it comes to achieving a flawless makeup application, a beauty blender is an essential tool in your arsenal. But with so many options available in the market, how do you choose the right one? Let’s walk through the important factors to consider.
Consider the Size and Shape
Beauty blenders come in various sizes and shapes, catering to different needs and preferences. The most common shape is the teardrop, which is versatile and suitable for most makeup applications. However, if you have specific areas to target, such as under the eyes or around the nose, there are also smaller and more precise options available.
The size of the beauty blender also matters. Larger blenders are great for quickly applying foundation all over the face, while smaller ones are perfect for detailed work and reaching corners and crevices. Consider your makeup routine and choose a size and shape that suits your needs.
Check the Material
The material used in a beauty blender plays a crucial role in its performance. Most blenders are made of latex-free foam, which is soft, bouncy, and absorbs minimal product. This material allows for seamless blending and reduces product wastage.
If you have sensitive skin or latex allergies, make sure to choose a beauty blender that explicitly states it is latex-free. This ensures a comfortable and irritation-free makeup application.
Look for a Reputable Brand
With the popularity of beauty blenders, many brands have entered the market with their versions. While it may be tempting to opt for a cheaper alternative, it’s essential to choose a reputable brand. Established brands invest in research and development to provide high-quality beauty blenders that deliver superior results.
Do your research, read reviews, and choose a brand with a good reputation for producing reliable and long-lasting beauty blenders. Investing in a quality product will save you time, effort, and frustration in the long run.
Preparing Your Beauty Blender
To ensure optimal performance and longevity of your beauty blender, proper preparation is key. Follow these steps before using your beauty blender for the best results.
Cleanse the Beauty Blender Before First Use
Before using your beauty blender for the first time, it’s crucial to cleanse it thoroughly. This removes any residue or impurities from the manufacturing process, ensuring a clean application on your skin.
To cleanse your beauty blender, dampen it and apply a small amount of mild soap or brush cleanser. Gently massage the soap into the blender and rinse it under lukewarm water until the water runs clear. Squeeze out any excess water and let it air dry completely before using.
Wet the Beauty Blender
Unlike traditional makeup sponges, beauty blenders work best when dampened. Running your beauty blender under water and squeezing it a few times helps to expand the material, making it softer and more pliable.
Once your beauty blender is damp, make sure to squeeze out any excess water. It should be damp, not dripping wet, for the perfect application.
Squeeze Out Excess Water
After wetting your beauty blender, it’s important to remove any excess water. Squeeze the blender gently between your fingers or use a clean towel to gently press out the excess moisture. This ensures that the blender doesn’t dilute your products and helps create a flawless finish.
Applying Foundation
Foundation is the base of any makeup look, and using a beauty blender can provide a smooth and seamless application. Follow these steps for a flawless foundation finish.
Dot Foundation onto Your Face
Start by applying dots of foundation onto your face. Focus on areas that require more coverage, such as blemishes, redness, or uneven skin tone. Dabbing the foundation onto your face instead of directly onto the blender allows for more control and even distribution of the product.
Use a Damp Beauty Blender
Take your damp beauty blender and gently bounce it onto the dots of foundation. The bouncing motion helps to blend the product into the skin while creating a natural and airbrushed finish. Avoid dragging or swiping the blender across your face, as it may cause streaks or uneven coverage.
Gently Blend in a Stippling Motion
Continue bouncing the beauty blender all over your face, focusing on blending the foundation seamlessly into your skin. Use a light hand and stippling motion to create a flawless finish. Stippling involves gently pressing the blender onto the skin in a dabbing motion, rather than dragging or rubbing.
Achieving a Flawless Complexion
To achieve a flawless complexion, there are a few techniques you can use while applying your makeup with a beauty blender. Follow these steps for a natural and even finish.
Build Up Coverage Gradually
If you prefer more coverage, don’t worry! You can build up your foundation gradually by applying thin layers and blending each layer with your beauty blender. This technique allows you to control the level of coverage and prevent the foundation from looking heavy or cakey.
Blend in a Bouncing Motion
As mentioned earlier, using a bouncing motion with your beauty blender is the key to achieving a flawless complexion. The blending technique helps to create an even and airbrushed finish, seamlessly blending the foundation into your skin.
Remember to be gentle while blending, as using too much pressure can disrupt the foundation and disturb the coverage.
Pay Attention to Hard-to-Reach Areas
Hard-to-reach areas, such as around the nose, under the eyes, and along the hairline, require extra attention. Use the pointed tip of your beauty blender to reach these areas and blend the foundation seamlessly. The pointed tip allows for more precise application and helps create a seamless transition between the foundation and the skin.
Contouring and Highlighting
Contouring and highlighting are techniques that can add dimension and definition to your face. When using a beauty blender for these purposes, follow these steps for a flawless result.
Apply Contour Shade with Precision
For contouring, choose a shade that is a few shades darker than your natural skin tone. Apply the contour shade along the hollows of your cheeks, the sides of your nose, and the jawline to create shadows and enhance your facial structure.
Using the pointed tip of your beauty blender, apply the contour shade with precision. The pointed tip allows for more control and helps create precise lines and definition.
Blend Contour Lines Seamlessly
Once you’ve applied the contour shade, it’s time to blend it seamlessly into your skin. Bounce your beauty blender along the contour lines, softly blending the product into your foundation. This creates a natural and well-blended appearance, avoiding any harsh lines or patches.
Use a gentle bouncing motion and take your time to ensure a flawless and natural contour.
Use a Damp Beauty Blender for Subtle Highlighting
To highlight areas of your face, choose a shade that is a few shades lighter than your natural skin tone. Apply the highlight shade to the high points of your face, such as the cheekbones, brow bone, and the bridge of your nose.
Using a damp beauty blender, gently bounce the highlight shade onto the desired areas. The dampness of the blender helps to create a soft and diffused glow, enhancing your features without any harsh lines.
Blending Cream Blush or Bronzer
Cream blush and bronzer can add a natural flush of color and warmth to your complexion. Here’s how you can use your beauty blender to blend them seamlessly into your skin.
Dab Cream Blush/Bronzer onto Your Cheeks
Start by dabbing a small amount of cream blush or bronzer directly onto your cheeks. Focus on the apples of your cheeks for blush and the hollows of your cheeks for bronzer.
Using your fingers or a brush, apply the cream product in small dots or streaks onto your cheeks for easy blending.
Blend by Tapping Gently
Take your damp beauty blender and gently tap it onto the cream blush or bronzer, blending it into your skin. The gentle tapping motion helps to evenly distribute the product and create a natural flush of color or a sun-kissed glow.
Avoid rubbing or swiping the blender, as it may disturb the foundation underneath or create uneven patches.
Layer and Build as Desired
If you want to intensify the color or increase the warmth of the bronzer or blush, you can layer and build the product gradually. Start with a small amount, blend it into your skin, and assess the color. If desired, repeat the process until you achieve your desired intensity.
Remember to always blend and assess your progress after each layer to prevent going overboard with the product.
Setting and Baking
Setting your makeup with powder helps to prolong its wear and prevent creasing. Here’s how you can use your beauty blender to set your foundation and achieve a smooth finish.
Apply Setting Powder with a Damp Beauty Blender
Take your damp beauty blender and lightly dip it into your setting powder. Gently press the powder onto your face in rolling motions, avoiding any dragging or rubbing. The dampness of the blender helps to pick up the right amount of powder and distributes it evenly.
Applying setting powder with a beauty blender ensures a controlled and even application, setting your foundation without leaving a cakey or powdery finish.
Press and Roll for a Smooth Finish
To ensure a smooth finish and a seamless blend between the foundation and powder, press and roll the beauty blender onto your skin. This technique helps to mattify the foundation and set it in place while maintaining a natural and hydrated appearance.
Avoid dragging or wiping motions, as they can disturb the foundation and create uneven patches.
Use Baking Technique in Areas that Require More Coverage
The baking technique is an excellent way to set areas of your face that require more coverage or have a tendency to crease, such as under the eyes and around the nose.
After applying the setting powder with your beauty blender, use a generous amount of powder and let it sit on the designated areas for a few minutes. The heat from your skin will allow the powder to set, and then you can gently dust away the excess with a brush or a clean beauty blender.
Cleaning and Maintenance
Proper cleaning and maintenance of your beauty blender are essential for its longevity and performance. Follow these steps to keep your blender in excellent condition.
Rinse Thoroughly after Each Use
After using your beauty blender, rinse it thoroughly under lukewarm water. Make sure to squeeze and rinse out any leftover product until the water runs clear. This step helps to remove any build-up or residue, preventing the growth of bacteria and maintaining the integrity of the blender.
Use Mild Soap or Cleanser
To cleanse your beauty blender, use a small amount of mild soap or brush cleanser. Work the soap into the blender, gently massaging it to remove any impurities. Rinse it under running water until the soap is completely gone.
Avoid using harsh cleansers or alcohol-based products, as they can damage the material of the beauty blender.
Allow to Air Dry Completely
After cleansing, squeeze out any excess water from your beauty blender and let it air dry completely. Placing it in a well-ventilated area allows the blender to dry naturally, preventing the growth of mold or bacteria.
Avoid using a hairdryer or placing it in direct sunlight, as these methods can cause the material of the blender to harden or degrade.
Replacing Your Beauty Blender
While a beauty blender can last for a long time with proper care, it’s important to monitor its wear and tear and replace it when needed. Follow these guidelines to determine when it’s time to invest in a new beauty blender.
Monitor Wear and Tear
Regularly inspect your beauty blender for signs of wear and tear. Look out for any cracks, tears, or crumbling edges. If you notice any damage, it’s a clear indicator that it’s time for a replacement.
Additionally, if your beauty blender starts to lose its shape, becomes too soft, or is not performing as well as it used to, consider replacing it.
Replace Every 3-4 Months
As a general rule of thumb, it’s recommended to replace your beauty blender every 3-4 months. Over time, the material of the blender can start to break down, making it less effective and potentially harboring bacteria.
Replacing your beauty blender regularly ensures optimal performance and hygiene, allowing for a flawless makeup application.
Consider Buying a Value Pack
If you find yourself using a beauty blender frequently or have multiple areas to target, it may be worth considering buying a value pack. Value packs usually contain multiple beauty blenders at a more affordable price, allowing you to have backups or options for different makeup techniques.
Consider your usage and needs before deciding on a value pack, as it can be a cost-effective option for makeup enthusiasts or professionals.
Pro Tips and Tricks
Here are some pro tips and tricks to take your beauty blender game to the next level.
Use a Beauty Blender for Applying Skincare Products
Your beauty blender isn’t just limited to makeup application. You can also use it to apply skincare products such as moisturizers, serums, or sunscreens. The gentle bouncing motion helps to evenly distribute the product and ensure maximum absorption into the skin.
Use the Pointed Tip for Precise Application
The pointed tip of your beauty blender is excellent for more precise application. Whether you’re applying concealer to cover blemishes or blending eyeshadow in specific areas, the pointed tip allows for more control and accuracy.
Experiment with Dampness Level for Different Finishes
The dampness of your beauty blender can affect the finish of your makeup. Experiment with different levels of dampness to achieve different results. A slightly damp blender provides a natural and dewy finish, while a dryer blender can create a more matte and full-coverage look.
Play around with the dampness levels to find the perfect finish for your makeup style and preferences.
By following these tips and techniques, you’ll be able to make the most out of your beauty blender and achieve a flawless makeup application every time. Remember to choose the right beauty blender, prepare it properly, and take care of it for long-lasting performance. Happy blending!