Welcome to a simple and fun tutorial on how to make your very own DIY sugar scrub! This article will guide you through the easy steps of creating a luxurious and exfoliating scrub using just a few basic ingredients that you probably already have in your kitchen. Say goodbye to store-bought scrubs and hello to a personalized and budget-friendly spa experience right in the comfort of your own home. Let’s get started on your journey to softer and smoother skin!
How To Make DIY Sugar Scrub?
Have you ever wanted to pamper yourself with a luxurious sugar scrub, but didn’t want to break the bank buying one at the store? Well, look no further! In this article, I’ll show you how to make your own DIY sugar scrub right at home. It’s easy, affordable, and customizable to suit your skin’s needs. Let’s get started!
Why Make Your Own Sugar Scrub?
Making your own sugar scrub has many benefits. Not only is it cost-effective, but you also have full control over the ingredients used, ensuring that it’s free of any harmful chemicals or artificial fragrances. Plus, you can customize the scrub to suit your skin type and preferences, whether you have dry, oily, or sensitive skin.
Benefits of Sugar Scrub
Sugar scrubs are a great way to exfoliate and moisturize your skin. The gentle abrasive action of sugar helps to remove dead skin cells, leaving your skin soft and smooth. In addition, sugar is a humectant, which means it helps retain moisture, keeping your skin hydrated. Regular use of sugar scrub can also improve blood circulation and promote healthier, glowing skin.
Ingredients You’ll Need
To make your own DIY sugar scrub, you’ll need just a few simple ingredients that you probably already have in your pantry. Here’s what you’ll need:
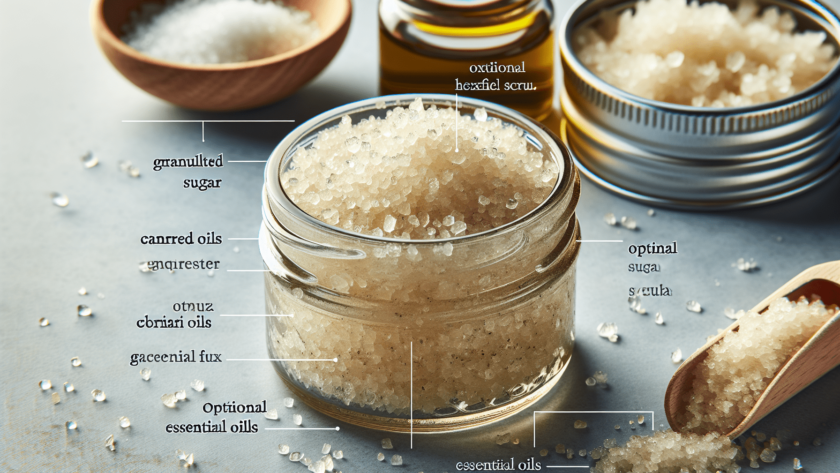
- Granulated sugar: Acts as an exfoliant to slough off dead skin cells.
- Carrier oil (such as coconut oil, olive oil, almond oil, etc.): Provides moisture and nourishment to the skin.
- Essential oils (optional): Adds fragrance and additional skincare benefits.
- Airtight container: To store the sugar scrub.
How To Make DIY Sugar Scrub
Now that you have gathered all the ingredients, let’s dive into the step-by-step process of making your own DIY sugar scrub.
-
Measure Ingredients: Start by measuring out the granulated sugar and carrier oil. For a basic sugar scrub, you can use a ratio of 2 parts sugar to 1 part oil. Adjust the ratio based on your preference for a more abrasive or moisturizing scrub.
-
Mix Ingredients: In a mixing bowl, combine the measured sugar and carrier oil. Stir well until the sugar is fully coated with the oil. If you want to add essential oils for fragrance, now is the time to do so. Just a few drops are enough to add a lovely scent to your scrub.
-
Store: Transfer the mixture into an airtight container, such as a mason jar or a plastic tub. Make sure to label it with the date of preparation to keep track of its shelf life. Your DIY sugar scrub is now ready to use!
How To Use Sugar Scrub
Using your DIY sugar scrub is simple. Here’s a step-by-step guide on how to incorporate it into your skincare routine:
-
Dampen Skin: Before applying the sugar scrub, dampen your skin with warm water. This helps to open up your pores and prepares your skin for exfoliation.
-
Apply Scrub: Scoop out a small amount of the sugar scrub and gently massage it onto your skin in circular motions. Focus on rough areas such as elbows, knees, and heels, but avoid the delicate skin on your face.
-
Rinse Off: Once you have exfoliated your skin, rinse off the sugar scrub with warm water. Pat your skin dry with a towel, and voila! You’ll be left with soft, smooth skin.
-
Moisturize: Finish off your skincare routine by applying a moisturizer to lock in the hydration. Your skin will thank you for the extra dose of moisture.
DIY Sugar Scrub Recipes
Now that you’ve mastered the basic sugar scrub recipe, here are some variations you can try to cater to different skin types or scent preferences:
Hydrating Coconut Sugar Scrub
- 1 cup granulated sugar
- 1/2 cup coconut oil
- 1/4 cup shredded coconut (optional)
- 10 drops coconut essential oil
This scrub is perfect for dry skin, as coconut oil provides deep hydration, and the shredded coconut adds extra exfoliation.
Invigorating Citrus Sugar Scrub
- 1 cup granulated sugar
- 1/2 cup olive oil
- Zest of one lemon and one orange
- 10 drops lemon essential oil
- 10 drops orange essential oil
The refreshing scent of citrus oils will awaken your senses, while the combination of sugar and olive oil will leave your skin soft and glowing.
Soothing Lavender Sugar Scrub
- 1 cup granulated sugar
- 1/2 cup almond oil
- 1 tablespoon dried lavender buds
- 10 drops lavender essential oil
Lavender is known for its calming properties, making this scrub perfect for sensitive or irritated skin. The dried lavender buds provide gentle exfoliation.
Tips for Using DIY Sugar Scrub
- Patch Test: Before using any new sugar scrub, it’s a good idea to do a patch test on a small area of your skin to ensure you don’t have any allergic reactions.
- Frequency: You can use a sugar scrub 2-3 times a week, depending on your skin type. Avoid over-exfoliating, as it can strip your skin of its natural oils.
- Storage: Store your DIY sugar scrub in a cool, dry place to prolong its shelf life. If you notice any changes in color or smell, it’s time to toss it out.
By following these tips and recipes, you’ll be well on your way to creating your own personalized sugar scrub that will leave your skin looking and feeling fabulous. So why not treat yourself to a spa-like experience right at home? Your skin will thank you for it!


