You love the feeling of freshly painted nails, but nothing frustrates you more than when that perfect coat of polish starts to chip. It’s a problem we’ve all dealt with at some point, but fear not – there are simple and effective ways to fix chipped nail polish without having to completely redo your manicure. Whether it’s a small chip or a more noticeable one, you’ll discover easy tips and tricks to bring your nails back to their polished glory in no time. Say goodbye to chipped nails and hello to long-lasting, flawless manicures with these tried and true techniques.
Materials needed
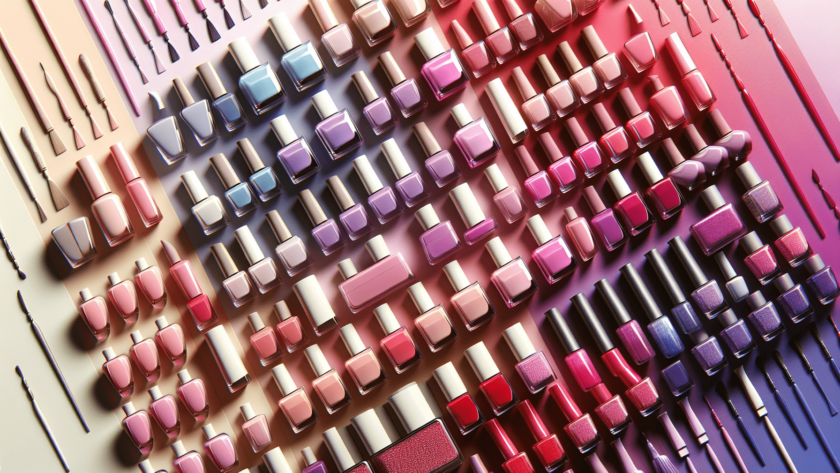
To fix chipped nail polish, you will need a few key materials. Acetone or nail polish remover will be necessary to remove the old polish. You will also need cotton balls or pads to apply the remover and clean your nails. A nail file is essential to file and shape your nails before applying new polish. Additionally, you will need a base coat, nail polish in your desired color, and a top coat to ensure longevity and shine. To correct any mistakes or smudges, a nail polish corrector pen or brush will come in handy. Lastly, don’t forget to have cuticle oil or hand lotion on hand to moisturize your cuticles and keep them healthy.
Preparation
Before jumping into the process of fixing your chipped nail polish, it’s essential to prepare properly. Start by cleaning your nails thoroughly to remove any dirt, oils, or residue. This will allow the new polish to adhere better and last longer. Gather all the materials you will need in one place to make the process more efficient. It can be frustrating to realize halfway through that you’re missing something. Finally, take a moment to protect your workspace to avoid any accidental spills or stains. Lay down a towel or use a nail mat to catch any drips or polish splatters.
Step-by-step instructions
Now that you’re ready, let’s go step by step through the process of fixing chipped nail polish.
-
Assess the damage: Take a close look at your nails to determine the extent of the chipping. Identify any areas that need extra attention or filing.
-
Remove the chipped polish: Dip a cotton ball or pad in acetone or nail polish remover and gently rub it over your nails to remove the old polish. Take care not to scrub too harshly, as this can damage your nails. If you have stubborn polish that won’t budge, soak the cotton ball in the remover and place it on the nail for a few seconds before wiping away the polish.
-
File and shape the nails: Use a nail file to shape your nails to your desired length and shape. File in one direction, avoiding a back-and-forth sawing motion that can weaken the nails. This step is crucial for creating a smooth surface for the new polish to adhere to.
-
Apply a base coat: Apply a thin layer of base coat to each nail. This will help the polish adhere better and protect your nails from staining. Allow the base coat to dry completely before moving on to the next step.
-
Apply the nail polish: Choose your desired nail polish color and apply it in thin, even coats. Start from the base of your nail and paint upwards towards the tip. Be careful not to paint over the skin around your nails. Allow the first coat to dry before applying a second coat if needed. Remember, thin coats are better than thick ones, as they dry faster and are less likely to chip.
-
Use a top coat: After the nail polish has dried completely, apply a layer of top coat over each nail. The top coat will add shine and seal in the polish, making it last longer and chip less easily. Apply the top coat in the same manner as the nail polish, using thin, even strokes.
-
Fix small imperfections with a corrector pen: If you accidentally smudge the polish or make any small mistakes, use a nail polish corrector pen or brush to clean up the edges. Dip the pen or brush in polish remover and carefully erase any imperfections.
-
Moisturize the cuticles: Apply cuticle oil or hand lotion to your cuticles to keep them moisturized and healthy. This step is often overlooked but essential for maintaining the overall health of your nails.
-
Touch up throughout the week: As the week goes on, keep an eye out for any minor chips or imperfections that may occur. Use the same polish color and follow the same steps to touch up any areas that need attention. This will help extend the life of your manicure and keep your nails looking fresh.
-
Remove and reapply after a week: After about a week, it’s time to remove your polish and start fresh. Use acetone or nail polish remover to remove the old polish, and then repeat the steps outlined above for a beautiful and chip-free manicure.
Tips and tricks
Here are some helpful tips and tricks to achieve the perfect manicure and avoid chipped nail polish:
- Use thin coats of polish: Applying thin coats of polish allows each layer to dry faster and reduces the chance of chipping.
- Avoid applying polish to wet nails: Make sure your nails are completely dry before applying any polish to prevent bubbling and uneven application.
- Seal the tips of the nails: Apply a thin layer of polish to the tips of your nails to seal them and prevent chipping.
- Apply polish in a cool environment: Heat can cause the polish to become thick and difficult to work with. Choose a cool and well-ventilated area for the best results.
- Keep hands steady while painting: Rest your hand on a flat surface or use a table for support to keep your hand steady and avoid smudging.
- Use the correct brush size: Choose a brush that matches the width of your nails. This will help you paint more precisely and avoid getting polish on your skin.
- Clean up mistakes immediately: If you make a mistake while applying polish, wipe it away with a cotton swab or corrector pen before it dries.
- Avoid excessive hand washing: Frequent washing and exposure to water can weaken the polish, so try to limit it as much as possible.
- Use gloves for chores: When doing household chores that involve water or chemicals, protect your manicure by wearing gloves.
- Experiment with different nail techniques: Have fun and try out different techniques, like nail decals, glitter top coats, nail wraps, or nail art. It’s a great way to keep your nails fresh and exciting.
Alternative solutions
If you’re looking to switch up your nail game or add some extra flair, consider these alternative solutions:
- Nail decals or stickers: Apply pre-designed nail decals or stickers for a quick and easy nail art look.
- Glitter or textured top coats: Add some sparkle or texture to your nails by applying a glitter or textured top coat over your base color.
- Nail wraps or strips: Nail wraps or strips are adhesive sheets that can be applied to your nails for a trendy and intricate design without the fuss of hand-painting.
- Gradient or ombré designs: Create a gradient or ombré effect by blending two or more nail polish colors together using a sponge or a makeup sponge.
- Nail art or stamping: Explore nail art techniques like stamping, where you transfer intricate designs onto your nails using special nail stamping plates and polish.
Preventing future chips
While fixing chipped nail polish is essential, taking steps to prevent chips in the first place is even better. Here are some tips for maintaining chip-free nails:
- Apply a strong base coat: A good quality base coat will create a smooth surface and provide a durable foundation for your nail polish.
- Avoid water exposure for a few hours: After applying fresh polish, avoid submerging your nails in water for at least a few hours to give the polish ample time to dry and harden.
- Maintain nail length and shape: Regularly file and shape your nails to prevent them from catching on things and chipping.
- Protect nails during activities: Prioritize protecting your nails during activities that may put them at risk, such as gardening or housework.
- Use gloves when necessary: Wear gloves when you’re exposed to chemicals or doing household chores to protect your manicure from chipping.
- Reapply top coat every few days: Extend the life of your manicure by adding an additional layer of top coat every few days to refresh the shine and protect against chipping.
- Keep nails hydrated: Moisturize your nails and cuticles regularly to maintain their flexibility and prevent them from becoming brittle.
- Avoid harsh chemicals: Minimize exposure to harsh chemicals, such as cleaning agents or acetone, as they can weaken the nail polish and cause chipping.
- Avoid nail biting or picking: These habits can cause damage to your nails and lead to chipped polish. Instead, keep your nails well-groomed and resist the urge to bite or pick at them.
Common mistakes to avoid
To ensure a flawless manicure and avoid chip-related frustrations, it’s crucial to steer clear of these common mistakes:
- Skipping the base coat: The base coat creates an essential layer of protection and helps the polish adhere better to your nails. Don’t skip this step!
- Applying thick coats of polish: Thick coats take longer to dry and are more prone to chipping. Opt for thin, even coats instead.
- Applying polish to wet nails: Ensure your nails are completely dry before applying the polish to prevent bubbling and uneven application.
- Not sealing the tips: Applying polish to the tips of your nails helps seal them and prevents chipping.
- Not using a top coat: The top coat adds shine and extends the life of your manicure. Don’t forget this final step!
- Not fixing small imperfections: It’s easy to overlook small mistakes, but taking the time to fix them immediately will result in a cleaner and more polished look.
- Neglecting cuticle care: Healthy cuticles contribute to strong and beautiful nails. Keep them moisturized and avoid cutting or picking at them excessively.
- Not moisturizing the nails: Hydrated nails are less likely to become brittle and chip. Make sure to moisturize your nails regularly.
- Using old or expired polish: Old or expired polish can become thick and clumpy, leading to a less-than-perfect application and more chipping.
- Using the wrong brush size: Choose a brush that matches the size of your nails to ensure precise and even application of the polish.
Knowing when to seek professional help
While most nail issues can be resolved at home, there are times when it’s best to seek professional help. Here are some indications that it’s time to visit a nail technician or dermatologist:
- Persistent nail issues: If you’re experiencing persistent nail problems like brittleness, peeling, or repeated chipping, it may be worth consulting a professional.
- Nail infections: If you suspect a nail infection, characterized by redness, swelling, pain, or discharge, it’s crucial to seek medical attention.
- Severe nail damage: In case of severe nail damage or injuries that cause bleeding or lead to significant changes in nail shape, it’s best to consult a professional.
- Changes in nail color or texture: Any sudden changes in nail color or texture, such as discoloration, thickening, or pitting, should be examined by a dermatologist.
- Complications from self-treatment: If attempts to fix chipped nail polish or other nail issues at home result in increased pain, swelling, or worsening of the problem, it’s advisable to seek professional help.
Conclusion
Now you have all the tools and knowledge to fix chipped nail polish and maintain beautiful nails. By following the step-by-step instructions, utilizing the tips and tricks, and considering alternative nail techniques, you can enjoy the process of taking care of your own nails while experimenting with different designs. Remember to prioritize nail health, prevent future chips, and seek professional help when needed. With a little practice and care, you’ll have gorgeous, chip-free nails that you can be proud of. So go ahead and get creative with your nail polish – enjoy the process and show off your beautiful nails!