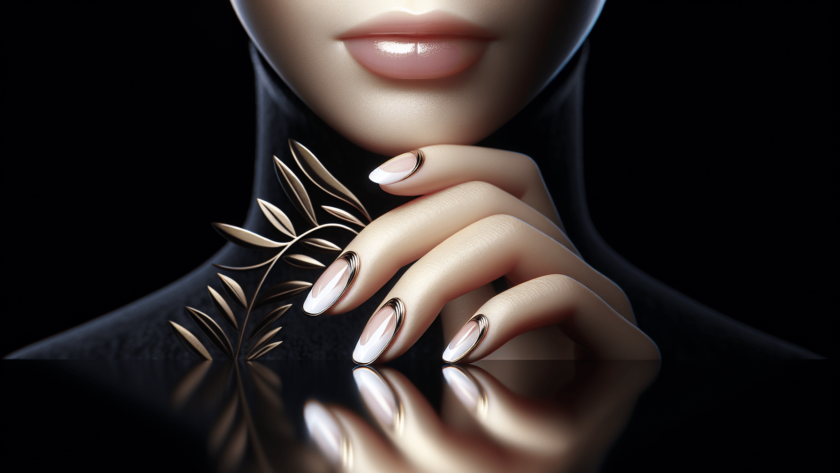
If you’ve ever wanted to achieve the classic elegance of a French manicure from the comfort of your own home, look no further. In this article, we’ll guide you through the step-by-step process of creating a flawless French manicure. From choosing the right colors to mastering the delicate technique, you’ll soon be able to achieve salon-quality results that will leave your nails looking chic and polished. So grab your favorite nail polish and get ready to transform your nails with a touch of Parisian flair!
Gather the necessary tools
To achieve a beautiful French manicure, you will need a few essential tools. Make sure you have these items before you begin:
Nail polish remover
Start with a clean slate by removing any old nail polish. Nail polish remover is a must-have in your French manicure toolkit.
Cotton balls or pads
You will need cotton balls or pads to apply the nail polish remover and wipe away the old polish.
Base coat
A good base coat helps to protect your nails and creates a smooth surface for the polish to adhere to. It also prevents staining and helps the manicure last longer.
White nail polish
The signature element of a French manicure is the white tip. Make sure to have a white nail polish on hand for this step.
Sheer pink nail polish
The base color of a French manicure is usually a sheer pink shade. This gives your nails a natural and elegant look.
Manicure brush
A fine, flat manicure brush is essential for precise application of the white tip. This tool will help you create the perfect French manicure look.
Nail tip guides
Nail tip guides are stickers or adhesive strips that help you achieve a crisp and consistent white tip on each nail. These guides ensure that your French manicure looks professional and neat.
Nail file
A nail file is useful for shaping and smoothing your nails before you begin the manicure. It helps create an even canvas for the polish.
Cuticle pusher
Pushing back your cuticles before applying the polish is an important step in a French manicure. A cuticle pusher helps gently push the cuticles back, giving your nails a clean and polished appearance.
Top coat
Finish off your French manicure with a layer of top coat. This will seal and protect your manicure, making it last longer and adding shine to your nails.
Prepare your nails
Before you start applying the polish, it’s important to prepare your nails properly. Follow these steps to make sure your nails are ready for the French manicure:
Remove any old nail polish
Using cotton balls or pads soaked in nail polish remover, wipe away any old nail polish from your nails. Make sure to clean the entire surface of each nail, including the corners and cuticle area.
Trim and shape your nails
Using a nail clipper or a nail file, trim your nails to your desired length. Next, shape them by filing the edges. You can choose between square, oval, or almond shapes, depending on your preference.
Soak your nails
Fill a small bowl with warm water and add a bit of gentle hand soap or a few drops of cuticle oil. Soak your nails in this mixture for a few minutes to soften the cuticles and remove any dirt or debris.
Push back your cuticles
After soaking, use a cuticle pusher to gently push back your cuticles. Be careful not to apply too much pressure to avoid injuring yourself. Pushing back the cuticles will create a clean and elongated nail bed, perfect for a French manicure.
File your nails
After pushing back the cuticles, use a nail file to shape the edges of your nails. File them in one direction to avoid splitting or damaging the nail bed. This step helps create a smooth surface for the polish to adhere to.
Apply the base coat
Now that your nails are prepped, it’s time to apply the base coat. This step is essential for the longevity and quality of your French manicure.
Clean and dry your nails
Before you apply the base coat, make sure your nails are clean and completely dry. Wipe away any residue from the previous steps to ensure proper adhesion of the polish.
Apply a thin layer of base coat
Using the brush that comes with the base coat polish, apply a thin layer to each nail. Start at the base and work your way up, making sure to cover the entire surface of the nail. The base coat will help the polish adhere better and prevent chipping.
Let it dry completely
Allow the base coat to dry completely before moving on to the next step. This usually takes a few minutes, so be patient. You can use this time to clean your brush and prepare for the next stages.
Use nail tip guides
To achieve a precise and uniform white tip, nail tip guides will be your best friend. These handy tools ensure that each nail has an equally sized and positioned tip.
Place nail tip guides on each nail
Take the nail tip guides and carefully place them on the edge of each nail. Make sure to align them parallel to the edges of your nails for a straight tip. The guides should cover only the area you want to paint white.
Leave a small gap at the tip
When positioning the nail tip guides, leave a small gap at the tip of each nail. This gap will be where you apply the white nail polish. Leaving a bit of space between the guide and the edge of your nail will help you achieve a more natural and gradient effect.
Paint the tips white
Now comes the iconic step of a French manicure – painting the tips white. This is what gives your nails that classic, elegant look.
Apply white nail polish to the tips
Using the white nail polish and your manicure brush, carefully paint the exposed tips of your nails. Start at one side and gently swipe the brush across the tip, moving towards the other side. Make sure the white polish covers the gap left by the nail tip guides.
Remove the nail tip guides while the polish is still wet
Quickly remove the nail tip guides before the white polish dries completely. This will ensure a crisp and clean edge. Gently peel off each guide from the side, being careful not to smudge the polish.
Apply the sheer pink polish
With the white tips done, it’s time to apply the sheer pink polish for the base color. This step gives your French manicure a natural and subtle finish.
Cover the entire nail with the sheer pink polish
Using the brush that comes with the sheer pink polish, apply a thin layer of polish to each nail. Start at the base and stroke the brush upwards towards the tip. Make sure to cover the entire nail evenly, including the white tip.
Let it dry completely
Allow the sheer pink polish to dry completely before moving on to the next step. This may take a few minutes, so be patient and avoid touching anything that could smudge your freshly painted nails.
Clean up any mistakes
Sometimes, mistakes happen during the painting process. If you’ve accidentally smudged the polish or need to clean up any uneven edges, don’t worry! Here’s how you can fix them:
Use a manicure brush dipped in nail polish remover to clean up any smudges or mistakes
Take a clean manicure brush and dip it into a small amount of nail polish remover. Gently brush away any smudges or imperfections around the nail bed or on the skin. This will give your French manicure a polished and professional look.
Apply the top coat
The top coat is the final layer of protection for your French manicure. It adds shine, durability, and longevity to your nails.
Apply a thin layer of top coat to seal and protect your French manicure
Using the brush that comes with the top coat polish, apply a thin layer to each nail. Start at the base and stroke the brush upwards towards the tip, just like you did with the previous polishes. Make sure to cover the entire surface of each nail, including the tip.
Let it dry completely
Allow the top coat to dry completely before doing any activities that could potentially ruin your manicure. The drying time varies depending on the brand and formula, so refer to the instructions on the top coat bottle for an estimated drying time.
Add finishing touches
Now that your French manicure is complete, it’s time to add some finishing touches to take care of your nails and enhance the overall look.
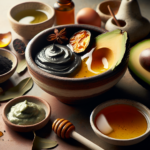
Moisturize your hands and cuticles with hand cream or cuticle oil
Apply a small amount of hand cream or cuticle oil to moisturize and nourish your hands and cuticles. Massage the product into your skin, focusing on the areas around the nails. This step will give your hands a healthy and hydrated appearance.
Enjoy your beautiful French manicure
Congratulations! You’ve mastered the art of doing a French manicure. Admire your perfectly polished nails and enjoy the elegant and timeless look of a French manicure. Whether you’re attending a special event or simply treating yourself to a little self-care, your beautiful nails will surely make you feel confident and put-together.