Are you tired of spending hours trying to achieve those perfect curls with your curling iron, only to have them fall flat within minutes? Look no further, because we’ve got the ultimate solution for you! In this article, we will walk you through the step-by-step process of curling your hair with a flat iron, achieving stunning, long-lasting curls that are sure to turn heads. Say goodbye to frizzy, unruly hair and hello to bouncy, voluminous curls that will last all day. Get ready to become your very own hairstylist and master the art of curling your hair with a flat iron!
Preparation
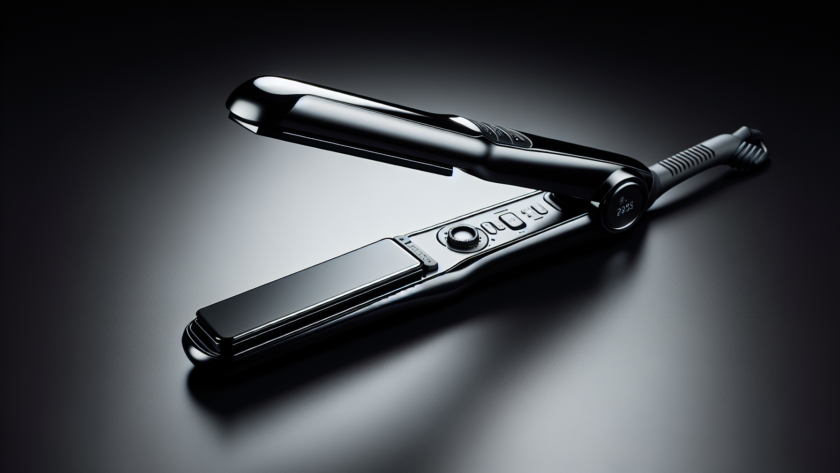
Before you start curling your hair with a flat iron, there are a few things you need to do to ensure the best results. First and foremost, it’s important to choose the right flat iron for your hair type. Look for one that has adjustable temperature settings and is made with ceramic plates for even heat distribution. This will help protect your hair from excessive heat damage.
Next, it’s crucial to protect your hair from the heat of the flat iron. Apply a heat protectant spray or serum to your hair before you start styling. This will create a barrier between your hair and the hot plates of the flat iron, minimizing damage and preventing breakage.
Lastly, prepare your hair by washing and drying it thoroughly. It’s best to start with clean, dry hair, as wet or damp hair can be more prone to damage when exposed to heat. Use a blow dryer or allow your hair to air dry completely before curling.
Sectioning the Hair
To achieve the perfect curls with a flat iron, proper sectioning is key. Start by brushing your hair thoroughly to remove any knots or tangles. This will ensure that the heat is distributed evenly throughout each section.
Once your hair is tangle-free, divide it into manageable sections using hair clips or hair ties. The number of sections will depend on the thickness of your hair, but generally, four to six sections will suffice. Make each section about one to two inches wide, depending on the desired size of your curls.
Secure the sections in place using hair clips or ties, making sure that they are tight enough to hold the hair in place but not too tight that they leave unwanted creases.
Curling Technique
Now that your hair is properly sectioned, it’s time to start curling with your flat iron. Follow these steps for a flawless curling technique:
-
Adjust the temperature: Different hair types require different heat settings. Fine or damaged hair should use a lower temperature, while thicker or coarser hair can handle higher temperatures. Start with a lower temperature and gradually increase it if needed.
-
Start with a small section: Begin by taking a small section of hair from one of the sections you prepared earlier. Start at the roots or mid-length of the hair, depending on how close to the scalp you want the curls to start.
-
Position the flat iron: Hold the flat iron vertically and clamp it down on the hair section, close to the roots. Make sure to leave some space between the iron and your scalp to avoid burns.
-
Twist the hair around the iron: Slowly twist the flat iron away from your face, so the hair wraps around the barrel. Keep the hair taut but not too tight to prevent excessive tension.
-
Hold and release: Hold the hair wrapped around the flat iron for a few seconds, typically 5-10 seconds, depending on your hair’s thickness and the type of curls you desire. Then, release the hair from the iron by gently pulling the flat iron downwards.
-
Continue with the remaining sections: Repeat steps 2 to 5 with the rest of the hair sections, making sure to work your way systematically from one section to the next. Take your time and be patient, as this will ensure that each curl is well-defined and long-lasting.
Creating Different Curls
With a flat iron, you can create various types of curls, depending on the technique you use. Here are some popular curl styles you can achieve:
-
Tight curls: To achieve tight curls, use smaller sections of hair and wrap them tightly around the flat iron. Hold the hair in place for a slightly longer duration before releasing it from the iron.
-
Loose curls: For loose, voluminous curls, use wider sections of hair and wrap them more loosely around the flat iron. You can also pull the flat iron through the hair more slowly to create softer, relaxed curls.
-
Beach waves: To achieve effortless beach waves, alternate the direction of the curls. Curl some sections towards your face and others away from your face, giving a natural, tousled look. Be sure not to curl the entire hair section, as leaving the ends straight will give a more relaxed beach wave effect.
Enhancing and Finishing
To enhance and perfect your curls, follow these steps to add the finishing touches:
-
Applying hair products: After curling your hair, you can apply hair products to enhance the longevity and definition of your curls. Use a lightweight hair mousse or curl-enhancing cream to define the curls and combat frizz.
-
Using a comb or fingers: Run a wide-tooth comb or your fingers through your hair to separate the curls and create a more natural look. Be gentle to avoid disrupting the curl pattern.
-
Apply hairspray for hold: To ensure that your curls stay in place all day, lightly spray a flexible hold hairspray over your styled hair. Remember to hold the hairspray can at a distance to avoid creating a stiff, crunchy texture.
-
Optional: add accessories: If you want to take your curls to the next level, consider adding some hair accessories. You can try adding a headband, hair clips, or even a sparkly hairpin to customize your look.
Tips and Tricks
To master the art of curling hair with a flat iron, here are some additional tips and tricks to keep in mind:
-
Practice makes perfect: Like any skill, curling your hair with a flat iron takes practice. Don’t be discouraged if your first attempt doesn’t turn out perfectly. Keep trying, and you’ll soon become a pro.
-
Experiment with different techniques: Don’t be afraid to try different curling techniques and styles to find what works best for you. Play around with the size of the sections, the direction of the curls, and the heat settings to achieve your desired look.
-
Use heat protectant: Always remember to apply a heat protectant before exposing your hair to any heat styling tools. This will minimize damage and keep your hair healthy and shiny.
-
Don’t rush the process: Take your time when curling your hair with a flat iron. Rushing can lead to uneven curls and potential damage. Enjoy the process and give each curl the attention it deserves.
Frequently Asked Questions
Here are answers to some common questions about curling hair with a flat iron:
Can I curl hair extensions with a flat iron?
Yes, you can curl hair extensions with a flat iron. However, it’s important to use caution and adjust the temperature accordingly. Synthetic hair extensions may melt or become damaged with high heat, so ensure you check the care instructions or consult a professional if you are unsure.
How long will the curls last?
The longevity of your curls will depend on various factors, such as your hair type, the products used, and environmental conditions. On average, well-cared-for curls can last anywhere from 8 to 12 hours or even longer. To extend the life of your curls, consider using a long-lasting hairspray and sleeping on a silk or satin pillowcase.
Can I curl wet or damp hair?
It’s generally not recommended to curl wet or damp hair with a flat iron. Wet hair is more susceptible to heat damage, and the moisture can interfere with the curling process. Ensure your hair is completely dry before using a flat iron to curl it.
Do I need to clean my flat iron afterward?
Yes, cleaning your flat iron is essential to maintain its performance and avoid product buildup. Once the iron has cooled down, gently wipe the plates with a damp cloth or use a dedicated flat iron cleaner to remove any residue. Avoid using harsh chemicals or abrasive materials that can scratch the plates.
Common Mistakes to Avoid
To ensure the best results and minimize potential damage, avoid these common mistakes when curling your hair with a flat iron:
-
Using the wrong temperature: Using a temperature that is too high can cause excessive heat damage, while a temperature that is too low may not effectively curl your hair. Find the right temperature for your hair type and adjust accordingly.
-
Not sectioning properly: Failing to divide your hair into manageable sections can make it harder to style and result in inconsistent curls. Take the time to section your hair properly before starting.
-
Overlapping hair on the iron: Overlapping the hair on the flat iron can result in uneven curls and may cause hair to get stuck or break. Make sure each section of hair is properly separated and only wrap the desired amount of hair around the iron.
-
Not letting the curls cool: Allowing the curls to cool down before touching or styling them further is crucial for the curls to set. Resist the temptation to play with your hair immediately after curling to ensure long-lasting results.
-
Using too much tension or pressure: Applying excessive tension or pressure when clamping the flat iron can lead to unwanted creases or damage to the hair. Use a gentle yet firm grip to achieve the best results.
Conclusion
Curling your hair with a flat iron can be a fun and versatile way to change up your look. By following the right preparation steps, sectioning your hair properly, and using the correct curling technique, you can achieve beautiful curls with just a flat iron. Remember to protect your hair from heat damage, experiment with different curl styles, and avoid common mistakes to ensure the best results. So grab your flat iron, and let your creativity shine through gorgeous curls!


