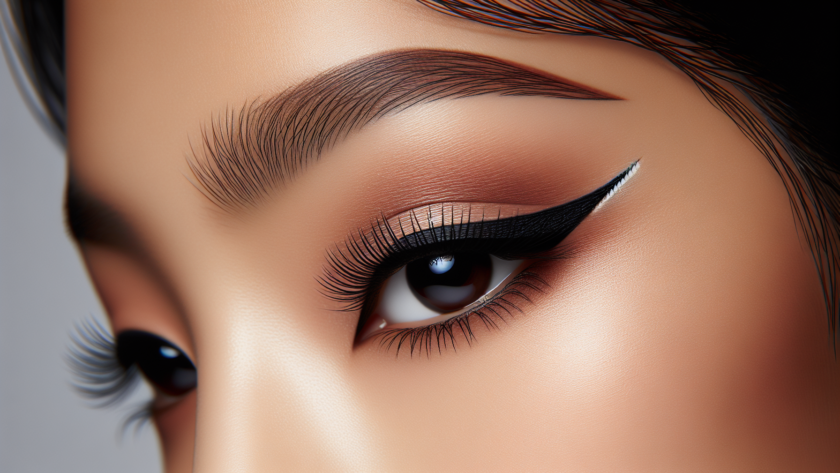
Do you desire that perfect cat-eye look but struggle with applying winged eyeliner? Look no further! In this article, you will discover simple yet effective techniques to effortlessly achieve flawless winged eyeliner. From choosing the right eyeliner tool to mastering the art of creating symmetrical wings, we have got you covered. Get ready to elevate your makeup game and rock that stunning winged eyeliner like a pro!
Preparation
Before you start applying winged eyeliner, it’s essential to prepare your face. Cleanse your face thoroughly using a gentle cleanser to remove any dirt, oils, or makeup residue. This step ensures that your eyeliner application will be smooth and long-lasting. After cleansing, moisturize your face to provide a hydrated canvas for your eyeliner.
Choosing the right eyeliner is crucial for achieving the perfect winged eyeliner look. Liquid eyeliner is popular for its precision and intense pigmentation. Gel eyeliner offers a smooth and creamy texture, making it easier to control for beginners. Pencil eyeliner is versatile and great for creating a softer winged look or smoky effect. Consider your preferences and the desired outcome when selecting your eyeliner.
Preparing your eyelids is essential to ensure a flawless and long-lasting winged eyeliner application. Start by applying an eyeshadow primer or concealer on your eyelids to create a smooth and even base. This step will help your eyeliner adhere better and prevent it from smudging or creasing throughout the day. Make sure to blend the primer or concealer well to avoid any harsh lines.
Creating a Winged Eyeliner Look with Liquid Eyeliner
To create a winged eyeliner look with liquid eyeliner, start by drawing a thin line along your upper lash line. Begin from the inner corner of your eye and gradually work your way towards the outer corner. Take your time and use short, controlled strokes for a precise application.
Now it’s time to create a small wing at the outer corner of your eye. Imagine an extension of your lower lash line and draw a line upwards towards the end of your eyebrow. This wing should be angled to suit your desired style and eye shape. Keep in mind that a smaller wing will create a more subtle look, while a longer wing will make a bolder statement.
To connect the wing to your upper lash line, draw a line starting from the tip of the wing and bring it back towards the center of your eyelid. This line should taper and become thicker as you move towards the inner corner of your eye. Make sure to keep the line as close to your lashes as possible for a seamless finish.
To intensify the look, thicken the line by going over it again with your liquid eyeliner. This step will give your winged eyeliner a more defined and dramatic appearance. Take your time and build up the thickness gradually, ensuring that both eyes match.
Lastly, fill in any gaps or uneven areas by carefully going back and filling them in with your liquid eyeliner. This step will ensure a cohesive and flawless winged eyeliner look. Make sure to check both eyes and make necessary adjustments to create a symmetrical appearance.
Creating a Winged Eyeliner Look with Gel Eyeliner
To create a winged eyeliner look with gel eyeliner, start by applying a thin line along your upper lash line. Use a small angled eyeliner brush for precise application. Begin from the inner corner and move towards the outer corner of your eye.
To extend the line into a wing, imagine an extension of your lower lash line and draw a line upwards towards the end of your eyebrow. This wing should be angled based on your preferred style and eye shape. Gel eyeliner allows for more control, so take your time and create a wing that suits your desired look.
Next, connect the wing to your upper lash line by drawing a line starting from the tip of the wing and bringing it back towards the center of your eyelid. This line should taper and become thicker as you move towards the inner corner of your eye. Ensure that the line is as close to your lashes as possible for a seamless finish.
Similar to using liquid eyeliner, you can thicken the line by going over it again with your gel eyeliner. This step will make your winged eyeliner look more defined and bold. Gradually build up the thickness while keeping both eyes symmetrical.
If there are any gaps or uneven areas, fill them in using your gel eyeliner and angled brush. Gel eyeliner allows for easy corrections and touch-ups, so take advantage of this to achieve a flawless winged eyeliner look.
Creating a Winged Eyeliner Look with Pencil Eyeliner
Creating a winged eyeliner look with pencil eyeliner offers a softer and more smudged effect. This technique is great for creating a smoky eye or a more subtle winged look.
To start, apply a thin line along your upper lash line using your pencil eyeliner. Start from the inner corner and move towards the outer corner of your eye. Pencil eyeliner offers a more forgiving application, making it a great option for beginners.
To extend the line into a wing, imagine an extension of your lower lash line and draw a line upwards towards the end of your eyebrow. This wing should be angled based on your preferred style and eye shape. Pencil eyeliner allows for a more natural-looking winged eyeliner, giving you the flexibility to create a subtle or bolder look.
Connect the wing to your upper lash line by drawing a line starting from the tip of the wing and bringing it back towards the center of your eyelid. This line should taper and become thicker as you move towards the inner corner of your eye. Blend the line slightly for a softer effect.
To make the winged eyeliner more defined, thicken the line by going over it again with your pencil eyeliner. Gradually build up the thickness while ensuring both eyes match.
If there are any gaps or uneven areas, fill them in with your pencil eyeliner. You can also use a smudging brush or a cotton swab to smudge the eyeliner for a more smoky effect.
Fixing Mistakes
Mistakes happen, even to the most experienced makeup lovers. Fortunately, there are several ways to fix them and achieve a flawless winged eyeliner look.
If you make a small mistake or want to clean up the edges of your wing, use a cotton swab dipped in makeup remover. Gently swipe the cotton swab along the area you want to correct or clean up. This technique allows for precision and helps you achieve a clean and sharp wing.
In case you have uneven or crooked lines, you can use a concealer that matches your skin tone. Apply a small amount of concealer to a small brush or a cotton swab and carefully go over the uneven lines to correct them. This method will help create a more even and balanced winged eyeliner look.
To set your eyeliner and prevent smudging, use a matching eyeshadow. Dip a small angled brush into the eyeshadow and carefully trace over your winged eyeliner. This step will enhance the longevity of your eyeliner and keep it in place throughout the day or night.
Tips and Tricks
Achieving the perfect winged eyeliner look takes practice and patience. Here are some tips and tricks to help you master the art of winged eyeliner:
-
Practice makes perfect: Don’t be discouraged if your first attempts aren’t flawless. Keep practicing, and over time, you’ll become more confident and skilled in creating the perfect wing.
-
Use tape as a guide: If you’re struggling with creating even wings, you can use a small piece of tape as a guide. Place the tape at an angle along the outer corner of your eye, following the natural line of your lower lash line. This will help you create symmetrical wings.
-
Try different eyeliner techniques: Don’t limit yourself to just one technique. Experiment with different eyeliner styles, such as a cat-eye or a double-winged look, to find what suits you best.
-
Experiment with different wing shapes: Wings can come in various shapes and angles. Try different styles to find the one that enhances your eye shape and complements your overall look.
-
Use a magnifying mirror for precision: For intricate eyeliner application, consider using a magnifying mirror. This will allow you to see the details more clearly and ensure a precise and accurate application.
-
Choose the right eyeliner brush: If you’re using gel eyeliner, invest in a good-quality angled eyeliner brush. The brush’s shape and bristles will greatly impact your application, so choose one that suits your preferences and needs.
Choosing the Right Eyeliner Color
Choosing the right eyeliner color can enhance your eyes and complement your overall makeup look. Here are some factors to consider when selecting the perfect eyeliner color:
-
Consider your eye color: Certain eyeliner colors can make your eye color pop. For example, purple and plum tones can enhance green eyes, while copper and bronze shades complement blue eyes.
-
Match your eyeliner to your outfit or accessories: If you want your eyeliner to coordinate with your outfit or accessories, opt for a color that complements your clothing color scheme. For example, a navy blue eyeliner can be a great match for a navy dress.
-
Opt for black or dark brown for a classic look: Black and dark brown eyeliners are timeless and versatile choices. They suit all eye colors and can be worn for both everyday or evening looks.
-
Try colored eyeliners for a bold statement: If you’re feeling adventurous, experiment with colored eyeliners like teal, purple, or gold. These shades can add a fun and unexpected element to your makeup look.
Completing the Look
To complete your winged eyeliner look, follow these final steps:
-
Apply mascara to your lashes to add volume and length. Start at the base of your lashes and wiggle the wand upward for a full and defined look.
-
Add eyeshadow to your eyelids to create depth and dimension. Blend a neutral shade into the crease of your eyelid and apply a shimmery shade on the lid to catch the light.
-
Enhance your eyebrows by filling them in with an eyebrow pencil or powder. Well-groomed eyebrows frame your face and complement your winged eyeliner.
-
Pair your winged eyeliner with a bold lip color for a statement look. Choose a shade that complements your skin tone and adds a pop of color to your overall makeup.
-
Finish your entire makeup look with a setting spray. This will help your winged eyeliner and other makeup last longer, even in humid or hot conditions.
Removing Winged Eyeliner
To remove your winged eyeliner, follow these steps:
-
Use a gentle makeup remover specifically designed for eye makeup. Apply a small amount to a cotton pad or a cotton ball.
-
Start from the outside of your eye and gently wipe along your lash line, moving towards the inner corner. Be careful not to pull or tug on the delicate skin around your eyes.
-
After removing the eyeliner, cleanse your face using your regular facial cleanser. This will ensure that all traces of makeup are removed from your skin.
Maintaining Winged Eyeliner
To keep your winged eyeliner looking fresh and flawless, follow these maintenance tips:
-
Avoid touching or rubbing your eyes throughout the day, as this can smudge or disturb your eyeliner.
-
Store your eyeliner properly to maintain its consistency and prolong its shelf life. Make sure to tightly close the lids of liquid and gel eyeliners to prevent them from drying out.
-
Clean your eyeliner brush regularly to remove any buildup of product or bacteria. This will help ensure a smooth application and prevent any eye irritation or infection.
By following these steps and incorporating these tips into your routine, you’ll be able to achieve a stunning winged eyeliner look that suits your style and enhances your features. Remember, practice makes perfect, so don’t be afraid to experiment and have fun with different techniques and colors.