When it comes to achieving that perfect rosy glow on your cheeks, applying blush can be a game-changer. But have you ever found yourself unsure of where to start or how to get it just right? Well, fear not! In this article, we will guide you through the simple steps of applying blush like a pro, so you can confidently enhance your natural beauty and achieve that radiant, youthful flush. Let’s get ready to blush and bring out your inner glow!
Choosing the Right Blush Shade
When it comes to choosing the right blush shade, it’s essential to consider your skin tone. Every individual has a unique skin tone, and different blush shades can complement different tones. If you have fair skin, opt for lighter shades like soft pinks or peaches. For medium skin tones, rosy pinks and coral shades work well. Those with deeper skin tones can go for richer colors like deep berries or plums.
In addition to your skin tone, examining undertones is crucial in finding the perfect blush shade. Undertones can be warm, cool, or neutral. If you have warm undertones, look for blushes with a peachy or golden hue. For cool undertones, opt for shades with blue or pink undertones. If you have neutral undertones, you have the freedom to experiment with various blush shades.
Furthermore, consider the occasion for which you’re applying blush. For day-to-day wear or work settings, opt for a more subtle and natural shade that enhances your natural blush. For special occasions or evening events, you can go for a more vibrant and dramatic blush shade that adds a pop of color to your face.
Preparing Your Skin
Before applying blush, it’s essential to prepare your skin to ensure a flawless application and longer-lasting wear. Start by cleansing your face to remove any dirt, oil, or makeup residue. Follow up with a moisturizer to hydrate your skin and create a smooth canvas for the blush. This step is especially crucial if you have dry skin, as blush tends to adhere better to well-moisturized skin.
Next, applying a primer specifically formulated for the face will further enhance the application and longevity of blush. Primers help to even out your skin tone, fill in pores, and create a smooth base for blush to adhere to. Be sure to choose a primer that suits your skin type, whether it’s mattifying, hydrating, or illuminating.
If you have any imperfections or blemishes you’d like to conceal, now is the time to do so. Apply a small amount of concealer to the areas that need coverage, such as under-eye circles, redness, or acne scars. Gently blend the concealer with your fingertips or a makeup sponge until it seamlessly merges with your skin.
Selecting the Right Tools
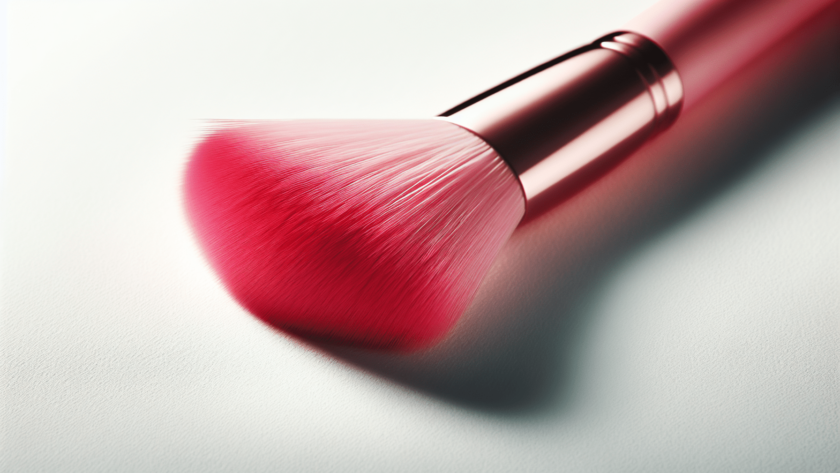
To achieve a flawless blush application, selecting the right tools is essential. The brush you choose can make a significant difference in how seamlessly the blush blends into your skin. Opt for a blush brush with soft, fluffy bristles that allow for a light and even application. These types of brushes ensure that you have control over the amount of product you apply, preventing any mishaps with excessive pigmentation.
Alternatively, you can use a sponge or beauty blender for a more natural and airbrushed finish. Dampen the sponge slightly before use, as this helps to sheer out the blush and create a more natural flush of color. Both options are valid, and it ultimately comes down to personal preference and the type of finish you desire.
Finding the Perfect Placement
Understanding the placement of blush on your face is crucial for achieving a natural and flattering look. The first step is to determine your face shape, as this will guide you in identifying the most flattering placement for your blush. Whether you have a round, square, heart-shaped, or oval face, there are specific areas on your cheeks where blush can work its magic.
To identify your cheekbones, make a gentle smile and feel for the bony structure that pops up beneath your skin. This area is where blush should primarily be applied. Depending on your face shape, you can apply it directly on the apples of your cheeks for a youthful look or slightly higher on the cheekbones for a more sculpted effect.
Furthermore, it’s crucial to keep in mind your facial structure when determining blush placement. For example, if you have a longer face, applying blush horizontally across the apples of your cheeks can help create the illusion of width. Conversely, if your face is rounder, you can apply blush in a more diagonal line, directing it towards your temples to create a more angular appearance.
Blending Techniques
Blending is the key to achieving a natural-looking blush application. Using a light hand is essential to ensure that the blush seamlessly merges with your skin. Tap off any excess powder from your brush before applying it to your face. This will prevent you from depositing too much product in one spot, which can be challenging to blend out evenly.
Start by applying the blush on the apples of your cheeks, which are the roundest and plumpest part of your cheek when you smile. This placement mimics a natural flush and gives your face a youthful appearance. From there, blend the blush gently towards your temples using light, circular motions. This technique helps to diffuse the color and create a soft gradient effect.
Powder Blush Application
Powder blush is a popular choice due to its ease of use and versatility. To achieve a seamless powder blush application, follow these steps. First, tap off any excess powder from your brush to ensure a light and even application. You can do this by lightly tapping the brush on the back of your hand or by blowing off any excess powder.
Next, apply the blush on your cheeks using soft, circular motions. Start with a light hand and gradually build up the color as desired. This allows you to have control over the intensity of the blush and prevents over-application. By layering the color gradually, you can achieve a more natural and blended look.
Cream or Liquid Blush Application
Cream and liquid blushes offer a more dewy and natural finish, perfect for those looking for a fresh and radiant complexion. The application process for these types of blushes is slightly different than powder blushes. Here’s how to apply them seamlessly.
Start by dotting the blush on the apples of your cheeks using your fingertips or a small brush. Use a patting or dabbing motion to blend the color into your skin, ensuring it merges seamlessly. Alternatively, you can use a damp sponge or beauty blender to achieve a more airbrushed effect.
If you feel like you need more intensity or want to build the color, layer the cream or liquid blush gradually. This technique allows you to have control over the pigmentation and prevents any streakiness or patchiness. Remember to blend well after each layer to avoid any harsh lines or uneven application.
Highlighting with Blush
Blushes with a subtle shimmer or highlighting finish can add an extra touch of glow to your complexion. Applying them strategically on the high points of your cheeks can create a beautiful, lit-from-within look. Here’s how to achieve a seamless blend of blush and highlighter.
Choose a highlighting blush shade or a blush with a shimmering formula. These types of blushes usually have a soft sheen or glow that catches the light and enhances your features. Apply the blush on the highest points of your cheekbones, right above where your blush is applied. This placement helps to enhance the natural structure of your face, making your cheekbones appear more prominent.
To blend seamlessly, use a fluffy brush or a clean fingertip and gently sweep or tap the blush and highlighter together. This step ensures that the transition between the two products is seamless and creates a harmonious glow on your cheeks.
Fixing Mistakes
Even the most skilled of makeup enthusiasts can make mistakes when applying blush. However, fear not, as there are quick and easy ways to fix any mishaps. In the case of applying too much blush, you can remove the excess by taking a clean blush brush and gently sweeping it over the areas with excessive pigmentation. This step helps to blend and diffuse the color for a more natural look.
If you find that the blush is too intense or doesn’t blend well with your foundation, lightly blend it out with some foundation or translucent powder. This will soften the edges and make the blush appear more seamless with the rest of your makeup.
In case you have applied the blush in the wrong area or it looks uneven, you can use a dab of concealer to help correct the mistake. Apply a small amount of concealer to the areas that need adjustment and blend it well with your fingertips or a makeup sponge. This technique can help to spot-correct any issues and create a more polished look.
Conclusion
Choosing and applying blush should be an enjoyable and creative process. By considering your skin tone, undertones, and the occasion, you can select the perfect shade that complements your complexion. Preparing your skin ensures a smooth canvas for the blush, while selecting the right tools helps in achieving a flawless application. Knowing the placement and blending techniques specific to your face shape enhances the overall look, whether you opt for powder, cream, or liquid blush. Highlighting with blush adds an extra touch of radiance, while fixing any mistakes is quick and easy. With these tips in mind, you’re ready to confidently apply blush and enhance your natural beauty. Happy blushing!