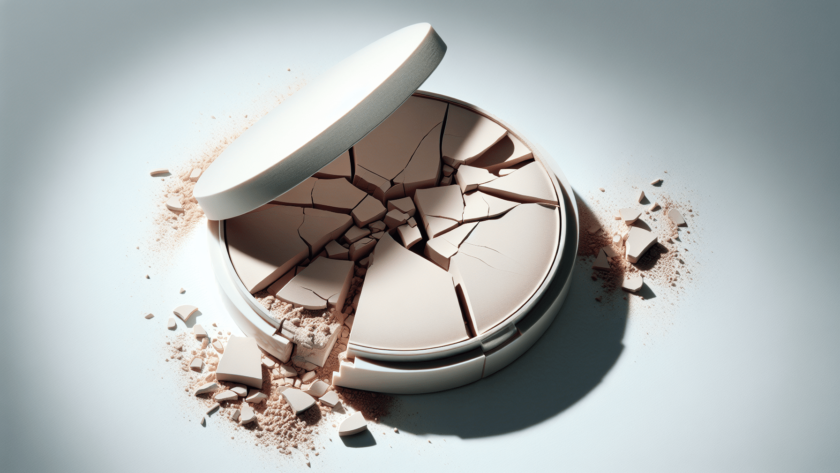
So, you’ve found yourself with a broken powder compact and you’re wondering how to fix it. Don’t worry, you’re not alone! Many of us have experienced the frustration of dropping our favorite makeup compact only to have it shatter into a thousand tiny pieces. But fear not, because in this article, I’ll share some simple and effective tips on how to fix a broken powder compact. By the end, you’ll be able to restore your compact to its former glory and never have to say goodbye to your favorite shade of blush or bronzer again. Let’s get started!
Identify the Damage
When your beloved powder compact breaks, the first step is to carefully inspect it and identify the type of damage it has sustained. This will help you determine the appropriate repair method and gather the necessary materials and tools.
Inspect the Compact
Take a close look at your compact and assess the extent of the damage. Is it a cracked compact, a loose or broken hinge, a loose mirror, a damaged clasp, a loose powder puff, or a damaged decoration? Identifying the specific problem will guide you in fixing it effectively.
Identify the Type of Damage
Once you’ve assessed the overall damage, you can further categorize it to ensure the most suitable repair approach. Is the compact cracked? Is the hinge broken or loose? Is the mirror detached? Is the clasp damaged? Is the powder puff loose? Are the decorations on the compact damaged? Understanding the specific type of damage will help you choose the appropriate repair method and proceed with confidence.
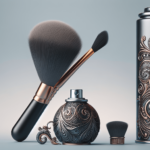
Gather Materials and Tools
Before diving into the repair process, it’s essential to gather all the necessary materials and tools. Here’s a list of what you’ll need:
Powder Compact
Of course, you’ll need the broken powder compact itself. Ensure you have all the pieces and nothing is missing before you begin the repair process.
Rubbing Alcohol
Rubbing alcohol is an excellent cleaning agent and is essential for preparing the compact for repair. Grab a small bottle of rubbing alcohol, preferably with a high concentration, to effectively clean the compact surface.
Small Brush or Toothpick
A small brush or toothpick will come in handy during the cleaning process. It will help you remove any remaining powder or debris from the cracks and crevices of the compact.
Clear Adhesive or Super Glue
To fix broken pieces or reattach components, you’ll need a clear adhesive or super glue. Choose a product specifically designed for compact repairs to ensure a secure and lasting bond.
Tissue or Cotton Swabs
Tissue or cotton swabs are essential for applying rubbing alcohol, removing excess adhesive, and providing precise cleaning in tight areas.
Fine-Grit Sandpaper or Emery Board
If there are any rough edges or uneven surfaces after the repair, you can use fine-grit sandpaper or an emery board to smoothen them out. This will help restore the compact’s appearance.
Clean the Compact
Before you start repairing the compact, it’s important to clean it thoroughly to ensure optimal adhesion and a professional finish.
Remove Any Remaining Powder
Use a small brush or toothpick to gently remove any remaining powder from the compact. Be careful not to apply too much pressure, as you don’t want to worsen any existing cracks or damage.
Clean with Rubbing Alcohol
Dampen a tissue or cotton swab with rubbing alcohol and gently clean the entire surface of the compact. This will remove any oils, residue, or dirt that may hinder the effectiveness of the adhesive later on. Allow the compact to dry completely before proceeding to the next step.
Repair a Cracked Compact
If your powder compact has cracked, don’t worry. With the right approach, you can seamlessly repair it and restore its functionality.
Gently Align the Cracked Pieces
Carefully align the cracked pieces of the compact, ensuring they fit together snugly. Take your time during this step to achieve the best possible alignment, as it will greatly affect the overall appearance of the repaired compact.
Apply a Small Amount of Clear Adhesive
Using a small brush or toothpick, apply a small amount of clear adhesive to both sides of the crack. Be cautious not to use too much adhesive, as it may seep out and leave a visible residue.
Press the Pieces Firmly Together
Once you’ve applied the adhesive, gently press the cracked pieces together, ensuring a secure and tight fit. Hold them in place for a few minutes to allow the adhesive to bond effectively.
Wipe Off Any Excess Adhesive
If any adhesive seeped out during the bonding process, quickly wipe it off with a tissue or cotton swab. Removing excess adhesive promptly will result in a cleaner and more professional-looking repair.
Fixing Loose or Broken Hinges
If the hinges of your powder compact are loose or broken, it’s essential to repair them to ensure your compact opens and closes smoothly and securely.
Remove Any Remaining Hinge Pieces
Carefully remove any remnants of the broken hinge from the compact. Ensure you don’t further damage the compact during this process.
Apply a Small Amount of Clear Adhesive or Super Glue to the Broken Hinge
Using a small brush or toothpick, apply a small amount of clear adhesive or super glue to the broken hinge. Be mindful of the quantity to avoid any excess adhesive that can affect the compact’s functionality.
Align and Press the Hinge Pieces Together
Align the broken hinge pieces and press them together firmly. Ensure they fit snugly to promote a strong bond. Hold the pieces in place for the recommended drying time specified by the adhesive manufacturer.
Allow It to Dry Completely
It’s crucial to allow the adhesive to dry completely before testing the compact’s functionality. Refer to the adhesive instructions for the suggested drying time, and follow them diligently to ensure optimal results.
Repairing a Loose Mirror
If the mirror on your powder compact is loose or detached, repairing it will restore both functionality and aesthetics to your beloved compact.
Remove the Mirror If Possible
If the mirror is easily removable from the compact, carefully take it out. Be gentle to avoid causing any further damage.
Clean the Mirror and the Compact Surface
Clean both the mirror and the compact surface with rubbing alcohol to remove any dirt, oils, or residue. This will ensure a clean and secure bond between the mirror and the compact.
Apply a Small Amount of Clear Adhesive or Super Glue to the Mirror
Using a small brush or toothpick, apply a small amount of clear adhesive or super glue to the back of the mirror. Be mindful of the quantity to avoid any excess adhesive that could overflow onto the mirror’s surface.
Press the Mirror Firmly into Place
Gently press the mirror onto the designated area on the compact’s interior. Ensure proper alignment and apply firm pressure to secure the mirror in place for a few minutes.
Allow It to Dry Completely
Let the adhesive dry completely to ensure the mirror is firmly attached. Avoid using the compact until the drying time recommended by the adhesive manufacturer has passed.
Fixing Loose or Broken Clasps
If the clasps on your powder compact are loose or broken, repairing them will restore the secure closure of your compact.
Clean the Clasp Area
Thoroughly clean the clasp area using rubbing alcohol to remove any oils, residue, or dirt. This will create a clean surface for the adhesive to bond effectively.
Apply a Small Amount of Clear Adhesive or Super Glue to the Broken Clasp
Using a small brush or toothpick, apply a small amount of clear adhesive or super glue to the broken clasp. Be cautious not to use too much adhesive, as it may seep out and create unwanted residue.
Align and Press the Clasp Pieces Together
Align the broken clasp pieces and press them together firmly. Ensure a snug fit to promote a strong bond. Hold the pieces in place for the recommended drying time specified by the adhesive manufacturer.
Allow It to Dry Completely
Allow the adhesive to dry completely before testing the functionality of the repaired clasp. Carefully follow the recommended drying time provided by the adhesive manufacturer for best results.
Repairing a Loose Powder Puff
A loose powder puff can make using your compact a frustrating experience. Follow these steps to repair it and regain the convenience of a securely attached puff.
Remove the Powder Puff
Remove the loose powder puff from the compact. Take care not to damage it during the removal process.
Clean the Puff and the Compact Surface
Clean both the powder puff and the compact surface with rubbing alcohol to ensure optimal adhesion. This will remove any oils, residue, or dirt that may hinder the effectiveness of the adhesive.
Apply a Small Amount of Clear Adhesive to the Center of the Compact
Using a small brush or toothpick, apply a small amount of clear adhesive to the center of the compact where the powder puff will be attached. Be mindful of the quantity to avoid any excess adhesive that may affect the appearance of the compact.
Press the Powder Puff Firmly onto the Adhesive
Gently press the powder puff onto the adhesive, ensuring it adheres securely to the compact. Apply firm pressure for a few minutes to allow the adhesive to bond effectively.
Allow It to Dry Completely
Allow the adhesive to dry completely to ensure the powder puff is securely attached. Avoid using the compact until the drying time indicated by the adhesive manufacturer has elapsed.
Fixing Damaged Compact Decorations
If the decorations on your compact become damaged, don’t worry – you can repair them and restore the compact’s visual appeal.
Clean the Area Around the Decoration
Clean the area surrounding the damaged decoration with rubbing alcohol to prepare it for repair. This will remove any residue or dirt that could compromise the adhesive’s effectiveness.
Apply a Small Amount of Clear Adhesive or Super Glue to the Damaged Decoration
Using a small brush or toothpick, apply a small amount of clear adhesive or super glue to the damaged decoration. Be cautious not to use too much adhesive, as it may seep out and create unwanted residue.
Align and Press the Decoration into Place
Align the damaged decoration and firmly press it into place. Ensure proper alignment and apply firm pressure to secure the decoration for a few minutes.
Allow It to Dry Completely
Allow the adhesive to dry completely before handling the compact or using it. Refer to the adhesive manufacturer’s instructions for the recommended drying time and follow them diligently.
Restore the Compact’s Appearance
After completing the necessary repairs, take the opportunity to restore the compact’s appearance to its former glory.
Smooth Out Any Rough Edges
If any rough or uneven edges remain after the repairs, use fine-grit sandpaper or an emery board to gently smooth them out. Be careful not to damage the compact’s surface or remove too much material.
Remove Excess Adhesive or Super Glue
Inspect the repaired areas and carefully remove any excess adhesive or super glue. Use a toothpick or a small brush to scrape away any visible residue.
Sand and Buff the Affected Area
Using fine-grit sandpaper or an emery board, gently sand and buff the areas where repairs have been made. This will help blend the repaired sections with the rest of the compact and restore a uniform appearance.
Clean the Compact Again with Rubbing Alcohol
Once the sanding and buffing are complete, clean the entire compact surface once more with rubbing alcohol. This final cleansing step will remove any residue or dust generated during the previous steps.
Apply a Light Powder or Makeup to Blend Any Visible Repairs
To further enhance the appearance of the repaired compact, you can lightly apply a powder or makeup that matches the compact’s original color. This will help blend any visible repairs and ensure a seamless finish.
Repairing a broken powder compact may seem like a challenging task, but with the right materials, tools, and step-by-step approach, you can regain the functionality and appearance of your favorite cosmetic accessory. Remember to handle each repair step with care, allowing the adhesive to dry completely before using the compact. Through your dedication and attention to detail, you’ll be able to prolong the lifespan of your powder compact and continue enjoying its benefits for years to come.