
Get ready to discover more amazing beauty tips and hacks to enhance your natural beauty in our latest installment of “Beauty Tips & Hacks (26-50)”. Empowering you to feel confident and radiant, this article is filled with easy-to-follow tips and tricks that will revolutionize your beauty routine. From skincare secrets to genius makeup hacks, we’ve got you covered. Prepare to be amazed as you unlock a world of beauty possibilities that will leave you looking and feeling your absolute best. Get ready to unleash your inner beauty guru with these fabulous tips!
26. Skin Care Tips
26.1 Daily cleansing routine
Taking care of your skin starts with a proper daily cleansing routine. This is important to remove dirt, oil, and impurities that can accumulate on your skin throughout the day. To cleanse your skin effectively, start by choosing a gentle cleanser that is suitable for your skin type. Wet your face with lukewarm water, then apply the cleanser using gentle circular motions. Be sure to cleanse your face and neck thoroughly, and rinse off the cleanser with water. Pat your skin dry with a clean towel and follow up with a toner and moisturizer for a complete cleansing routine.
26.2 Exfoliation
Exfoliation is a crucial step in maintaining healthy and glowing skin. It helps to remove dead skin cells, unclog pores, and promote cell turnover. You can exfoliate your skin using physical or chemical exfoliants. Physical exfoliants include scrubs with granules or brushes that manually remove dead skin cells. Chemical exfoliants, on the other hand, contain ingredients like alpha hydroxy acids (AHAs) or beta hydroxy acids (BHAs) that dissolve the bonds between dead skin cells. Remember to exfoliate your skin gently and not more than twice a week to avoid over-exfoliation and irritation.
26.3 Proper moisturization
Moisturizing your skin is essential to keep it hydrated and nourished. Regardless of your skin type, using a moisturizer helps to maintain the skin’s moisture barrier and prevent dryness. Look for moisturizers that are suitable for your skin type, whether it’s oily, dry, or combination. Apply a small amount of moisturizer on your face and neck after cleansing and toning to seal in the moisture. Don’t forget to extend the moisturizer down to your chest area as well for complete hydration.
26.4 Sun protection
Protecting your skin from the harmful effects of the sun is crucial for preventing premature aging and reducing the risk of skin cancer. Always apply sunscreen with at least SPF 30 before going outside, regardless of the weather or your skin tone. Make sure to cover all exposed areas, including your face, neck, ears, and the backs of your hands. Reapply sunscreen every two hours, especially if you’re spending prolonged periods outdoors or engaging in activities that make you sweat.
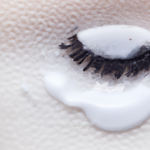
27. Makeup Removal Hacks
27.1 Using micellar water
Micellar water is a gentle and effective way to remove makeup and cleanse your skin. It contains tiny micelles that act as magnets, attracting and lifting dirt, oil, and makeup from the skin without stripping away its natural moisture. To use micellar water, soak a cotton pad with the product and gently wipe it across your face and eyes until all traces of makeup are removed. Micellar water is especially beneficial for those with sensitive skin as it doesn’t require rinsing.
27.2 Double cleansing method
The double cleansing method is a popular technique to thoroughly remove makeup and impurities from the skin. It involves using an oil-based cleanser followed by a water-based cleanser. Start by massaging an oil-based cleanser, like coconut oil or cleansing oil, all over your face to dissolve makeup and dirt. Rinse off with lukewarm water and follow up with a water-based cleanser to remove any remaining residue and cleanse your skin. This method ensures a deep and effective cleanse without stripping away essential oils.
27.3 Oil-based cleansers
Oil-based cleansers are excellent for removing stubborn makeup, including waterproof mascara and long-lasting lipsticks. These cleansers work by dissolving and lifting the makeup off your skin. Apply a small amount of oil cleanser onto dry skin and massage it in gentle circular motions. Pay extra attention to areas with heavy makeup. Rinse off the cleanser with lukewarm water and follow up with a water-based cleanser to complete the cleansing process.
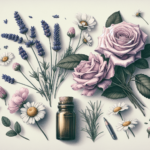
28. Natural Remedies for Glowing Skin
28.1 Lemon juice and honey mask
Lemon juice and honey are both natural ingredients known for their skin-brightening and hydrating properties. To create a glowing skin mask, mix equal parts lemon juice and honey in a bowl. Apply the mixture to your face and leave it on for 15-20 minutes. Lemon juice contains natural acids that exfoliate the skin, while honey moisturizes and soothes. Rinse off the mask with lukewarm water and enjoy the healthy glow it brings to your skin.
28.2 Turmeric and yogurt face pack
Turmeric is a powerful antioxidant and anti-inflammatory ingredient that can help improve your skin’s complexion and reduce inflammation. Mix one tablespoon of turmeric powder with two tablespoons of plain yogurt to create a thick paste. Apply the paste to your face, avoiding the eye area, and leave it on for 10-15 minutes. Rinse it off with lukewarm water and marvel at the natural radiance of your skin.
28.3 Aloe vera gel
Aloe vera gel is a versatile natural remedy that can benefit your skin in multiple ways. It has soothing properties that can calm irritated or inflamed skin, and its moisturizing effect helps to hydrate and nourish the skin. Apply a thin layer of aloe vera gel to your face and let it absorb for 10-15 minutes before rinsing it off with water. For best results, choose pure and organic aloe vera gel without any added ingredients.
29. Hair Care Tips
29.1 Choosing the right shampoo and conditioner
Choosing the right shampoo and conditioner is crucial for maintaining healthy hair. Look for products that are specifically formulated for your hair type, whether it’s oily, dry, or damaged. Avoid shampoos and conditioners containing harsh chemicals like sulfates and opt for those that are gentle and moisturizing. Additionally, consider using a clarifying shampoo once a month to remove any product buildup and restore the natural shine of your hair.
29.2 Regular scalp massages
Scalp massages are not only relaxing but also beneficial for your hair health. Massaging your scalp stimulates the hair follicles, improves blood circulation, and promotes hair growth. You can use your fingertips to gently massage your scalp in circular motions for a few minutes every day or invest in a scalp massager tool for an even more invigorating experience.
29.3 Protecting hair from heat damage
Excessive heat styling can cause damage to your hair, leading to dryness, frizz, and breakage. To protect your hair from heat damage, use a heat protectant spray before using any hot tools like blow dryers, straighteners, or curling irons. This will create a barrier between your hair strands and the heat, minimizing the potential damage. Additionally, try to limit the use of heat styling tools and opt for heatless hairstyles whenever possible.
29.4 Trimming split ends
Regularly trimming your hair is essential for maintaining its overall health and preventing split ends from traveling up the hair shaft. Aim to trim your hair every 6-8 weeks or as needed to remove any damaged or split ends. This will help your hair look healthier, prevent breakage, and promote growth.
30. Quick and Easy Hairstyling Hacks
30.1 Beach waves with a flat iron
Achieving effortless beach waves doesn’t have to be complicated. You can create beautiful waves using just a flat iron. Start by dividing your hair into sections. Take a small section of hair and clamp the flat iron about halfway down the strand. Twist the iron away from your face, then slowly glide it towards the ends of your hair. Release the iron, and you’ll have a relaxed and natural-looking wave. Repeat this process for each section of hair until you achieve your desired wavy hairstyle.
30.2 Messy bun with a sock
If you want a quick and effortless hairstyle for a casual day or on-the-go, try the sock bun technique. Cut the toe part of a clean sock to create a tube-like shape. Pull your hair into a high ponytail and slide the sock onto the ponytail. Roll your hair over the sock to create a bun and secure it with bobby pins. Gently pull and loosen the bun for a messy and voluminous look. This hack allows you to create a stylish bun without any heat or styling products.
30.3 Heatless curls using headbands
If you prefer heatless styling methods, try using headbands to create beautiful curls overnight. Start with slightly damp hair and wrap small sections of hair around a stretchy headband. Continue wrapping and tucking your hair until all the hair is secured in the headband. Leave it overnight or for a few hours, then carefully remove the headband to reveal soft and bouncy curls. Finish the look with some texturizing spray or hairspray for extra hold.
31. Nail Care Tips
31.1 Moisturizing cuticles
Moisturizing your cuticles is an essential step in nail care. Dry and cracked cuticles can lead to painful hangnails and even infections. Apply cuticle oil or moisturizer regularly to keep your cuticles hydrated and healthy. Gently massage the oil or moisturizer into your cuticles and nails, and let it absorb for a few minutes. Regularly moisturizing your cuticles will promote stronger and healthier nail growth.
31.2 Wearing gloves while doing chores
Protecting your nails while doing household chores is crucial to prevent damage and breakage. Wear gloves when washing dishes, cleaning, or gardening to shield your nails from harsh chemicals, water, and dirt. This will help maintain the strength and integrity of your nails, keeping them looking beautiful and avoiding any unnecessary damage.
31.3 Using a base coat
Using a base coat before applying nail polish is an often overlooked step, but it can make a significant difference in the longevity and appearance of your manicure. A base coat creates a smooth surface for the nail polish, prevents staining, and helps the polish adhere better to the nails. Apply a thin layer of base coat onto clean and dry nails, and allow it to dry completely before proceeding with your desired nail polish color.
31.4 Applying nail oil
Nail oils are a fantastic way to nourish and strengthen your nails. They help replenish moisture, condition the nails and cuticles, and promote healthy growth. Apply a few drops of nail oil onto each nail, and gently massage it in circular motions. Doing this regularly will improve the overall health and resilience of your nails, making them less prone to breakage and brittleness.
32. DIY Hair Masks for Healthy Hair
32.1 Banana and avocado mask
Bananas and avocados are packed with vitamins and nutrients that can benefit your hair. Mash one ripe banana and half an avocado in a bowl until you have a smooth paste. Apply the mixture to your hair, focusing on the lengths and ends. Leave it on for about 30 minutes, then rinse it off with lukewarm water and shampoo as usual. This mask will leave your hair feeling soft, nourished, and more manageable.
32.2 Coconut oil and honey mask
Coconut oil is known for its moisturizing properties, while honey is a natural humectant that helps retain moisture in the hair. Mix two tablespoons of coconut oil with one tablespoon of honey in a bowl. Warm the mixture slightly, then apply it to your hair from roots to ends. Leave it on for 30-60 minutes before rinsing it off and shampooing your hair. This DIY hair mask will deeply hydrate and revive dry and damaged hair.
32.3 Egg and olive oil mask
Eggs are an excellent source of protein for your hair, while olive oil provides nourishment and shine. Beat two eggs in a bowl and add four tablespoons of olive oil. Mix well until the ingredients are combined. Apply the mixture to your hair, making sure to saturate all the strands. Leave it on for 20-30 minutes, then rinse it off with cool water. This mask will help strengthen your hair and add a healthy luster.
33. Smokey Eye Makeup Tutorial
33.1 Applying a primer
Before creating a smokey eye look, it’s important to apply an eyeshadow primer to ensure longevity and enhance the intensity of the eyeshadow. The primer creates a smooth base, evens out the skin tone on the eyelids, and helps the eyeshadow adhere better. Apply a small amount of primer to your lids and blend it out with your finger or a brush.
33.2 Eyeshadow placement
For a classic smokey eye, start by applying a light eyeshadow shade all over your eyelids as a base. Then, choose a medium-toned shade and apply it to the crease using a fluffy blending brush, focusing on the outer corner to create depth. Finally, take a dark eyeshadow shade and apply it to the outer corner and along the upper and lower lash lines to create the smokey effect. Blend the eyeshadows together seamlessly.
33.3 Blending techniques
Blending is key to achieve a seamless and well-blended smokey eye. Use a clean blending brush to blend the eyeshadows together, using circular or windshield wiper motions. This will soften any harsh lines and create a gradient effect. Take your time to blend thoroughly, ensuring that there are no harsh edges between the different shades.
33.4 Highlighting the inner corners
To add brightness and dimension to your smokey eye look, apply a shimmery or light eyeshadow shade to the inner corners of your eyes. This will help to open up your eyes and make them appear more awake. Use a small brush or your finger to apply the highlight shade and gently blend it into the inner corners.
34. Lip Care Routine
34.1 Regular exfoliation
Exfoliating your lips is an essential step in maintaining soft and smooth lips. Use a gentle lip scrub or make your own by combining sugar and honey. Gently massage the scrub onto your lips in circular motions for a minute or two, then rinse it off with warm water. This will help remove any dead skin cells and reveal fresh, supple lips.
34.2 Hydrating lip balms
Keeping your lips hydrated is crucial for preventing dryness, cracking, and chapping. Apply a hydrating lip balm throughout the day, especially before bed and before applying lipstick. Look for lip balms that contain moisturizing ingredients like shea butter, cocoa butter, or beeswax. This will help lock in moisture and keep your lips soft and kissable.
34.3 Avoiding licking lips
Licking your lips may provide temporary relief, but it actually worsens dryness and can lead to more chapped lips. Saliva evaporates quickly, leaving your lips even drier than before. Instead of licking, reach for your lip balm whenever your lips feel dry or parched. This will help to replenish moisture and protect your lips from further damage.
50. Air-drying Hair Tips
50.1 Using a microfiber towel or cotton t-shirt
Using a regular towel to dry your hair can cause frizz and breakage due to the rough texture. To preserve your hair’s natural texture and minimize damage, opt for a microfiber towel or a soft cotton t-shirt instead. Gently squeeze and blot your hair to remove excess moisture without rubbing or towel-drying aggressively.
50.2 Avoiding vigorous rubbing
Rubbing your hair vigorously with a towel can rough up the hair cuticles and lead to frizz and breakage. Instead, gently squeeze and pat your hair dry with a towel or t-shirt. This will help absorb excess water without causing unnecessary damage and maintain your hair’s natural texture.
50.3 Using a leave-in conditioner
To keep your air-dried hair smooth and manageable, apply a leave-in conditioner after towel-drying. This will help moisturize and detangle your hair, reducing the likelihood of frizz and promoting natural waves or curls. Apply the leave-in conditioner evenly through your hair, focusing on the ends, and comb through with a wide-toothed comb to distribute the product evenly. Allow your hair to air dry the rest of the way for a healthy and effortless look.
With these beauty tips and hacks, you can enhance your skincare, haircare, makeup, and nail care routines for healthier and more radiant results. Remember to customize these tips according to your own needs and preferences, and enjoy the process of taking care of yourself. Happy beautifying!